Aqua It Is!

So its been close to a month since I was looking for a paint color for the breakfast nook table, and finally I have gotten to it! Aqua was my favorite. I had looked at the room color, and the color theme trough out my house, and nothing seemed as right as a happy bright blue! I had laid out all the paint chips again, and noticed I like all the bright blues. Then it hit me. I had a syrup jar I had spray painted in ‘Rustoleum Aqua.’ I love that little jar. So I got it down and sat it on the table. A few seconds of thinking it over and well, I decided I was going to spray paint the table the same happy color!

As you can guess, time to tell you how I painted the table.
The legs are solid wood, but the top was not. It had a veneer. Yes, you can paint it still. Just don’t sand it down to far. Remember you are just trying to give the primer something to hold onto. I used a 220 sandpaper and hand sanded until the entire table was dull. After that I washed the table down with dawn and hot water, getting any dirt and grease off then let it dry over night.
")
Then I gave it 2 thin coats of Zinsser 123 Primer. Let it dry and set up over night.
")
After I felt the primer was good and on there, the husband and I picked this heavy table up and moved it through a maze of way too small doorways and placed it outside. I put my hamburger boxes back under the legs, to prevent serious over spray around the base. I wish I had laid out an old sheet instead, since there is overspray on the concrete now. Duuur huuurrr huurrrr duuuurrrr.. I started spraying thin and somewhat even coats over the table, 3 in total, with a few hours to dry in between. Left the table alone for 24 hours after to allow the paint to off gas, and cure up a bit before trying to bring it back in.
")
Love the legs.
")
Once I got it inside the house, I noticed the top was blotchy looking. I read that this is caused by spraying with humidity too high, and the paint absorbing moisture from the air. But living in the deep south, I would have to wait a good 6 months for the humidity to go away. I gave it a week to sit, untouched, while I looked for a way to fix this. Also letting the paint cure, without being dinged up by the family.
From what I read I could make the top look all purdy by lightly sanding, and using a polyurethane to clear coat. So I picked up a water based poly sold by Minwax. Why water based? Because it is much easier to work with. First I sanded with a super fine sanding sponge, wipe clean, and brushed on the first coat. Bubbles, bubbles everywhere. Hummm, I let it dry and sanded again, but this time, I used a rag to wipe it on. It looked good! I did 3 very thin coats.
")
What I used ^
All Dressed Up, No Place To Go.
")
Paint the chairs or leave them be?
")
")
I just love the legs!
")
So, What do you think?
")
I don’t know, some thing is saying I need to paint the chairs white…….
The Back Splash Is Grouted!

There is still so much to be done in here. But the tile is finished! We used a deep grey color grout, that we mixed ourselves. We had bright white and black on hand, and used 1 part white to 2 parts black. Its still deep without being stark, almost a very soft black. I love it. I stayed away from all white grout knowing how I cook, there would be stains everywhere. I got better things to do that scrub stains all day, HA! Here are the after pictures of the grout.
Keep in mind the floors, trim and touch up paint still needs to be done.
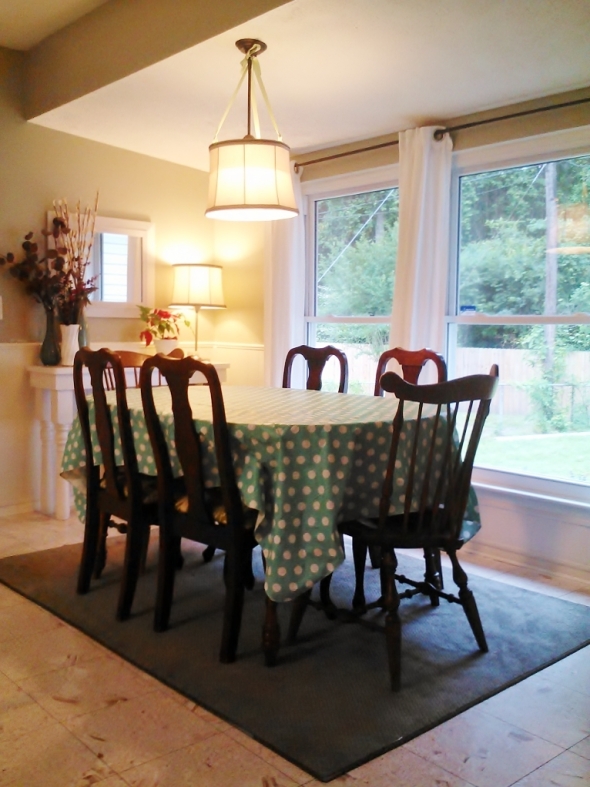
Looking in from the formal dining room
")
")
A close up
 (800x600)")
The sink wall
")
")
")
My Grandma painted this, I love the way it looks in here.
")
")
The Oven/Fridge Wall
")
 (800x600)")
")
")
Well, whats your thoughts on it?
Tiling & Grouting The Back Splash

A Quick How to/How We Did.
A list of things you are going to need
Well, what we used anyhow. In no particular order.
1. Tile. Duh ![]()
2. Mortar
3. Grout
3. Long Level Tool
3. Edge Straight
4. Tile saw/wet saw.
5. 2 Buckets. One for Mortar, one for clean water to rinse your hands. You don’t want mortar clogging your pipes.
6. Safety Glasses. Sharps slivers of tile are going to be flying from the saw.
7. Face mask for mixing the mortar. Bad stuff for your lungs
8. Notched Trowel (Size depends on the tile size you are putting up)
9. Trowel for scooping mortar onto the notched trowel. (We used a small garden trowel)
10. Towels for drying tile after cuts, and for hands.
11. Spacers (We didn’t use any this time)
12. Grout Float
13. Pencil for marking level, and tile for cuts.
14. Drill and attachment for mixing mortar.
Make sure you have all things you will need handy. Follow all directions on your mortar package. When your mix is ready it should be the consistency of peanut butter. Mixing with a drill will save your back and arms one hard workout mixing that stuff.

Sand the walls, and give the paint a good, rough feeling so the motor can adhere.
Make sure before you do anything, mark level, and center on the wall to keep the tile looking neat and not sloppy. If one row is off, its only going to look worse the more you add on. Get that first row level and straight, and your good to go!
")
We put up a board to keep everything just right.
")
I buttered up the wall with the mortar, and put the tiles up while he cut. I rather enjoyed this part. Sure it was messy, But fun! I also back buttered tile that was in an awkward spot, this way I could get the right amount on the tile and will without trashing the cabinet paint.
")
Here is a check list of what you are going to need for grouting.
1. Grout
2. 2 Buckets
3. Water
4. Mixer (Hand or drill attachment)
5. Grout float
6. Sponges
7. Rags for clean up
8. Grout sealer.
9. Putty Knife
Clean out any debris in between your tile. You do not want little mortar chunklets mixing in with your grout. Also make sure you have wiped clean all the tiles. You never know where your mortar covered hands were.
Make sure you add the water to the bucket first. Mix it smooth and let it sit for 10 minutes, then mix again after that. As always follow the instructions on your bag o mix. We mixed the white and black we had together to make a deep grey color.
")
Then you want to take the putty knife and spread some grout onto your grout float. Make sure you have a decent amount. Push into the cracks at a 45* angle, make sure you get it all in, and there are no gaps, or empty spots. pack it in! Packed in, no gaps, or empty spots. The grout keeps the water out from behind the tiles and off the mortar. If you have spots that are not filled/packed in, there is a higher chance of water getting behind the tile, wetting the mortar causing problems such as mold, and tiles becoming lose. You don’t want that!!!
The wall the husband grouted
")
The wall I grouted.
")
Let the grout set for 15 minutes, or what your bag says.
Don’t push super hard! You do not want the grout in the crack being stripped off! Just lightly wax on, wax off, with a damp sponge. Ours was so stuck on, we had to work for a few hours getting it off. What a bad morning that was. Ugh.
")
Leave it alone for a while, then come back over it with cheese cloth. As we didn’t have any, it was almost dry sponges over, and over, until the hazy glaze is no more.
")
Then you got something like this once its all cleaned up
 (600x800)")
In a few days you need to go over the grout with your sealer. That is it. One weekend 🙂
Water first